
Getting started · Owner mobile app or web dashboard
Add a tenant and create a rent lease
Record a tenant, select a vacant rental unit and set the lease terms that drive rent invoicing in RentPayor.
The PDF includes these steps and their available product screenshots.
Before you begin
- At least one property and available unit.
- The tenant's accurate details and agreed rent terms.
Step-by-step walkthrough
- 1
Add or select the tenant
Open Tenants. Check whether the tenant already exists; if not, use the add-tenant action and enter the information requested by the current form.
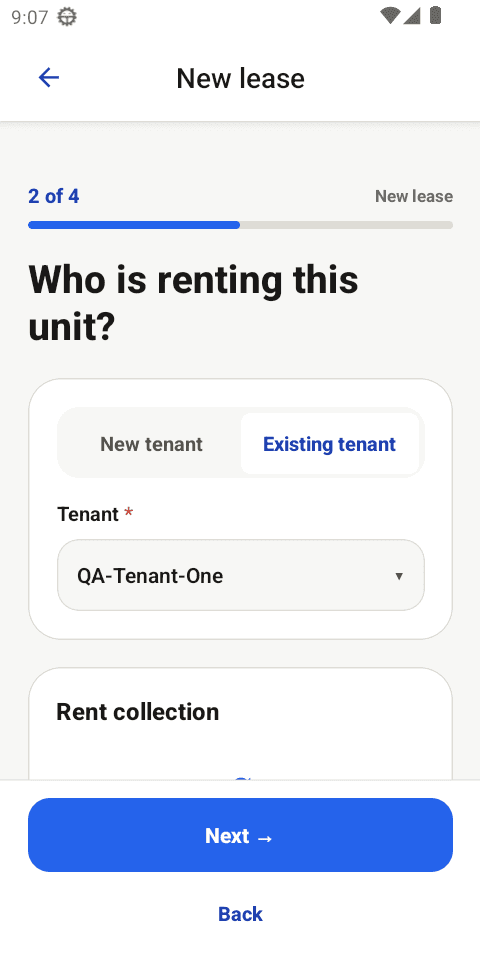
Current local QA emulator capture: the existing QA-Tenant-One record is selected for the lease. - 2
Confirm the tenant's property and unit
Confirm that the selected tenant will be linked to the intended property and vacant unit before entering the lease terms. Avoid assigning the tenant to the wrong unit.
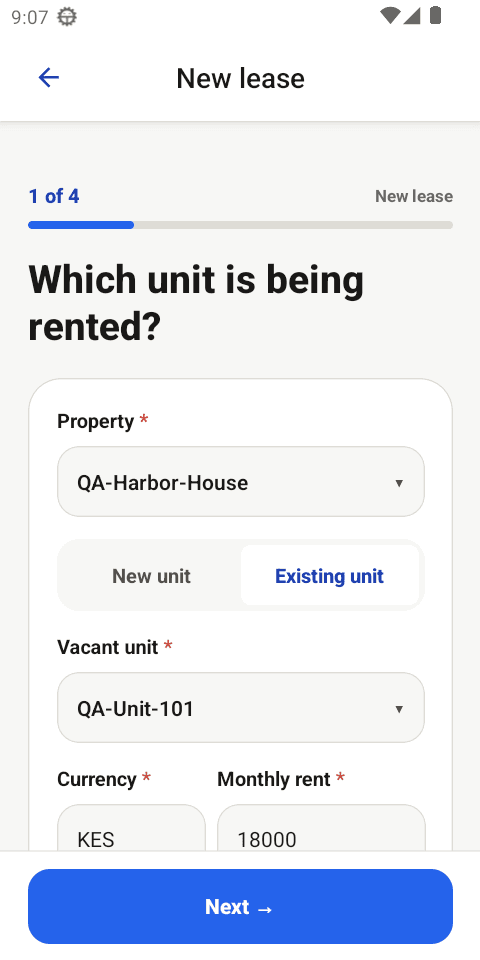
Current local QA emulator capture: confirm the intended property and vacant unit before adding lease terms. - 3
Start the lease
Open Leases and create a new lease for the intended vacant unit and tenant. Enter the rent amount, lease start date, due day and billing cycle shown by the app.
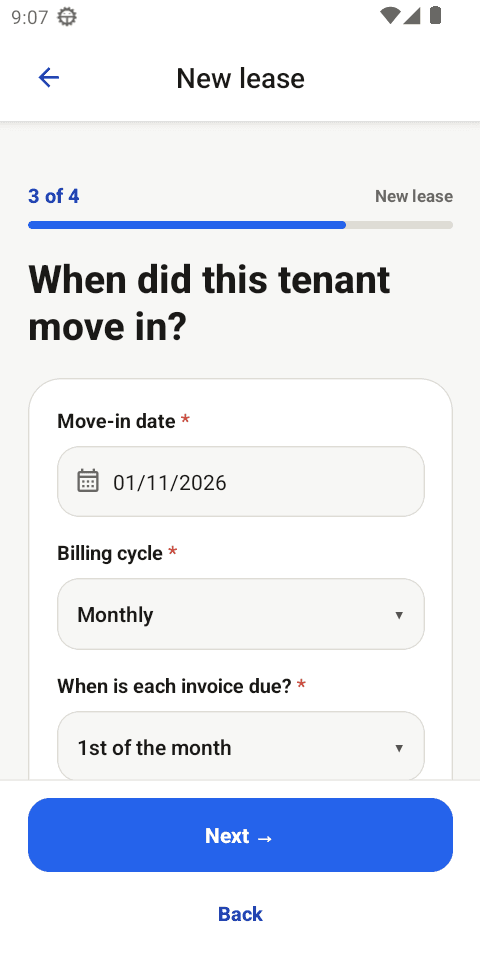
Current local QA emulator capture: enter the move-in date, monthly billing cycle and invoice due rule. - 4
Save and verify the rent terms
Confirm that the correct unit, tenant and billing terms appear on the saved lease. Where offered for a current lease, generate the first invoice during setup.
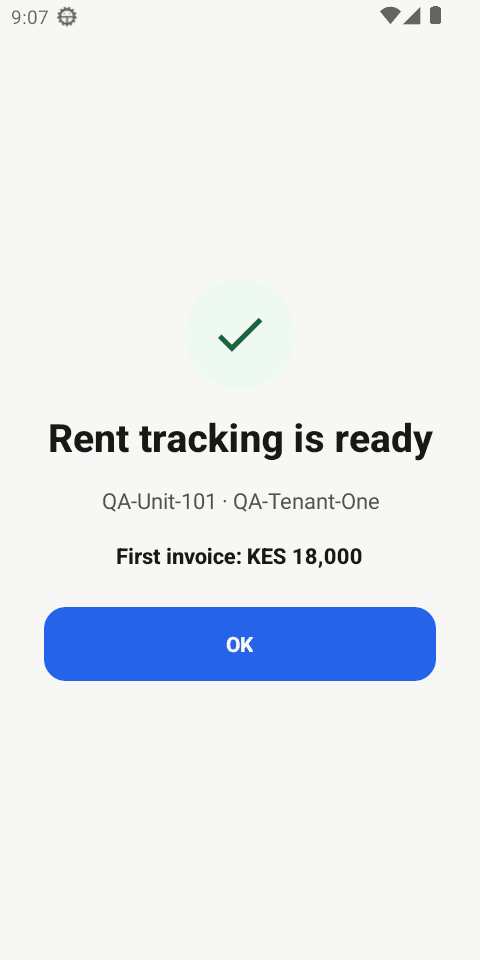
Current local QA emulator capture: the saved lease confirms QA-Unit-101, QA-Tenant-One and the first KES 18,000 invoice.
Expected result
- The tenant and unit are linked by a lease.
- Rent timing and amount are recorded.
- The rental record is ready for invoicing.
Important details
- The published images are fictional-QA orientation captures, not tenant or lease records. Do not publish real tenant names, telephone numbers or agreement details.