
Getting started · Owner mobile app or web dashboard
Add properties and rental units
Set up your rental portfolio in RentPayor by adding a property, creating its units and reviewing the resulting records.
The PDF includes these steps and their available product screenshots.
Before you begin
- A signed-in owner or authorized team member.
- The property's details and a list of its rental units.
Step-by-step walkthrough
- 1
Open Properties
From the main navigation, open Properties. Review your existing portfolio before adding a new record so you do not create a duplicate property.
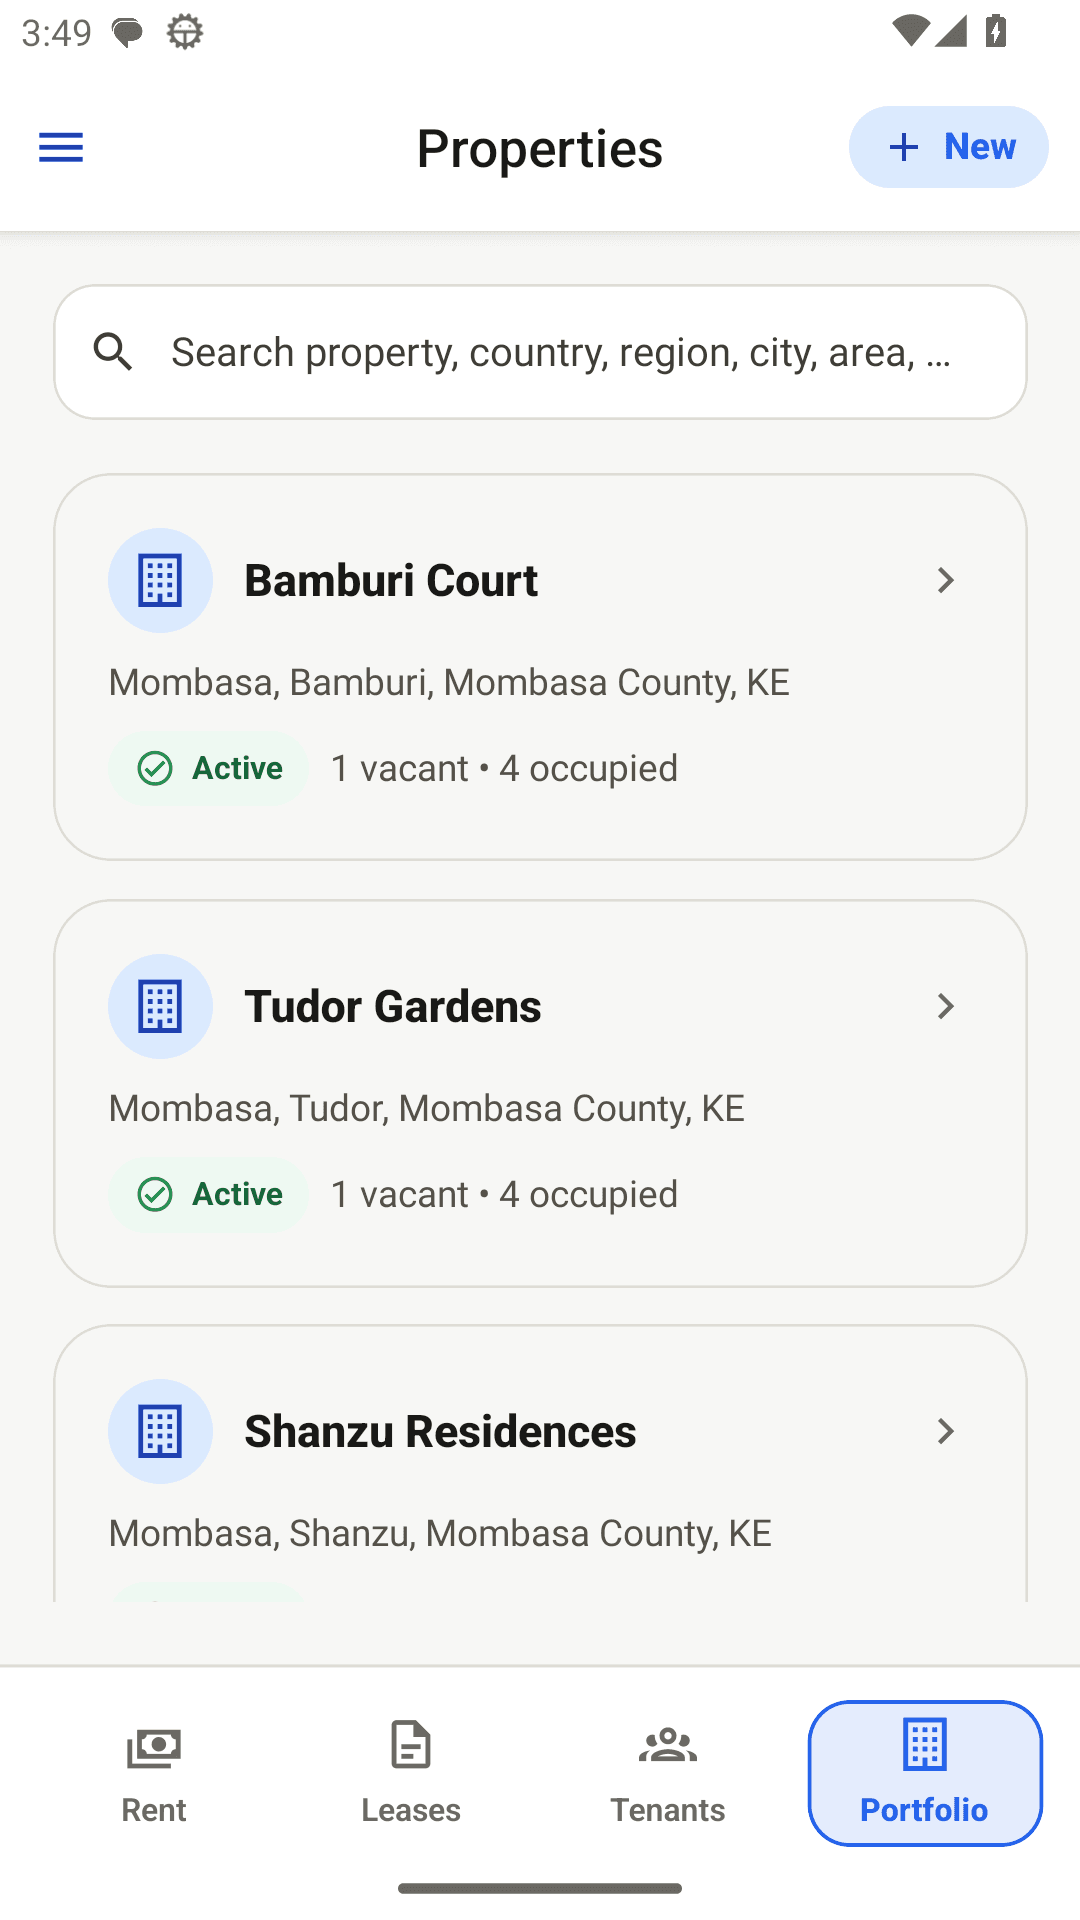
Fictional QA capture: review the property list before choosing New. - 2
Create and save the property
Choose the add-property action. Enter the details requested by the app, check them, and save. Open the new property to confirm it was created.
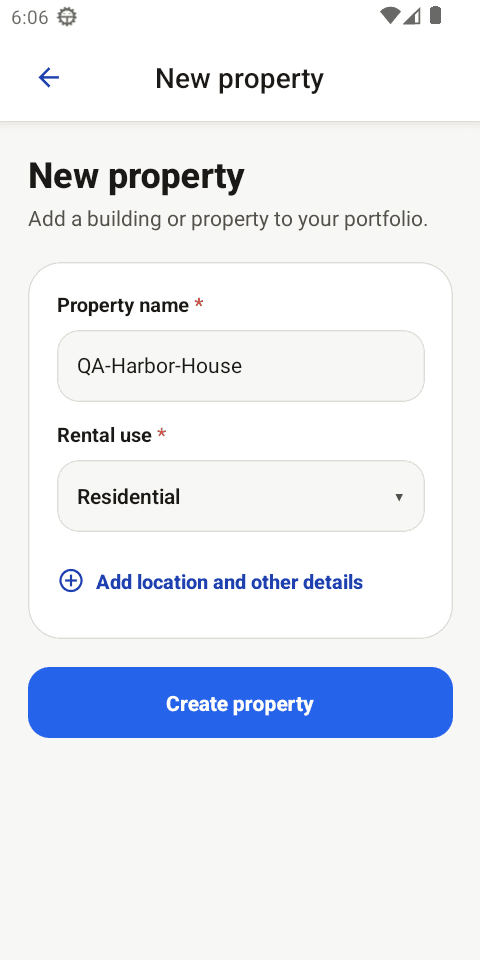
Current local QA capture: enter the required property details and save the new property. - 3
Add each rental unit
From the property or Units section, choose the action to add a unit. Use its actual door or unit identifier and the required rental details, then save. Repeat for additional units.
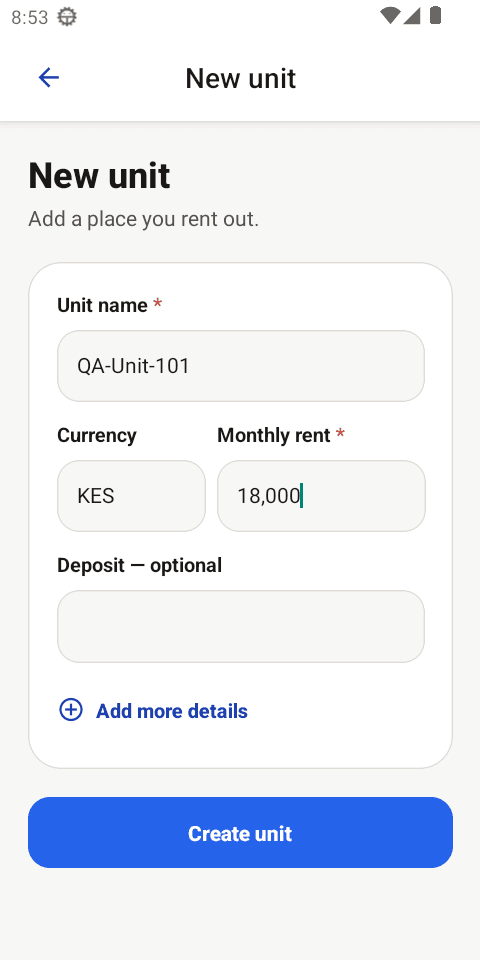
Current local QA emulator capture: QA-Unit-101 and KES 18,000 are entered before tapping Create unit. - 4
Review the portfolio
Check that each unit belongs to the intended property. Unit occupancy changes when leases are established; avoid treating every newly created unit as already occupied.
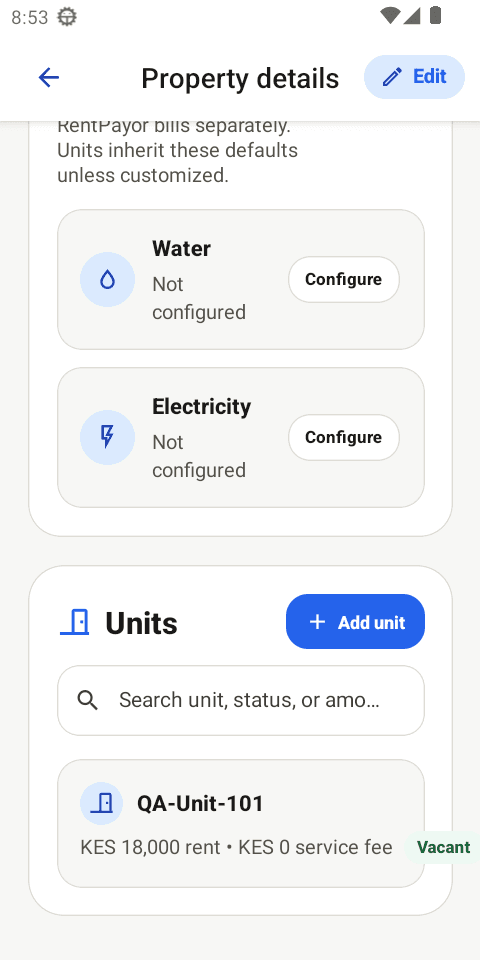
Current local QA emulator capture: QA-Unit-101 appears under the same QA-Harbor-House property after saving.
Expected result
- The property appears in the portfolio.
- Each unit is listed under the correct property.
- Units are ready to be linked to tenants and leases.
Important details
- The published images are fictional-QA orientation captures; the detailed unit screen will be replaced when a clean current QA capture is available.